Tuesday, May 15, 2012

Truffled Lobster Risotto

I'm back! I'm so sorry for my ridiculously long absence, but I blame the divestiture process. Normally for work I  integrate my company's acquisitions, but I was assigned my first divestiture to manage only to discover how much more all-consuming they are than acquisitions.  Who would have thought?! Same amount of work in a fraction of the time we're permitted for an acquisition.
But enough about work.  I was celebrating the end of my current project that kept me in the office, out of the kitchen, and in general, a very neglectful of my favorite side-project outside of work (aside from completing our renovations, of course! I guess there were two things to celebrate!) So after getting two 10-hour nights of sleep to recover, I got back in the mood for a celebratory dinner, which called to mind lobster, truffles, champagne, and raspberries.  Sounds pretty good right? It was delicious! I made a simple green salad of mixed greens and herbs (thank you TJ's for offering that in a bag!) with a vinaigrette of olive oil, raspberry vinegar, and about a TB of finely chopped shallots whisked together for a quick dressing.  A few raspberries on top and voile, a simple side for a delectably rich main course of truffled lobster risotto.
YUM!
Here's what I used taken pretty much directly from, you guess it, Epicurious:
2 frozen lobster tails from Whole Foods (on special for $11.99 for the pair -yes, please!)
4 carrots, peeled and finely diced
2 shallots, finely diced
1/4 cup white brandy
3 TB black truffle olive oil
3 1/2 cups low sodium chicken broth
1 cup aborio rice
1/3 cup whipping cream

1/3 cup chopped chives


To get started, get a salted pot of water going to a rapid boil while you preheat the oven to 425 degrees. Once the water is boiling, add the lobster tails and cook until they are just cooked through, about 8-10 minutes.

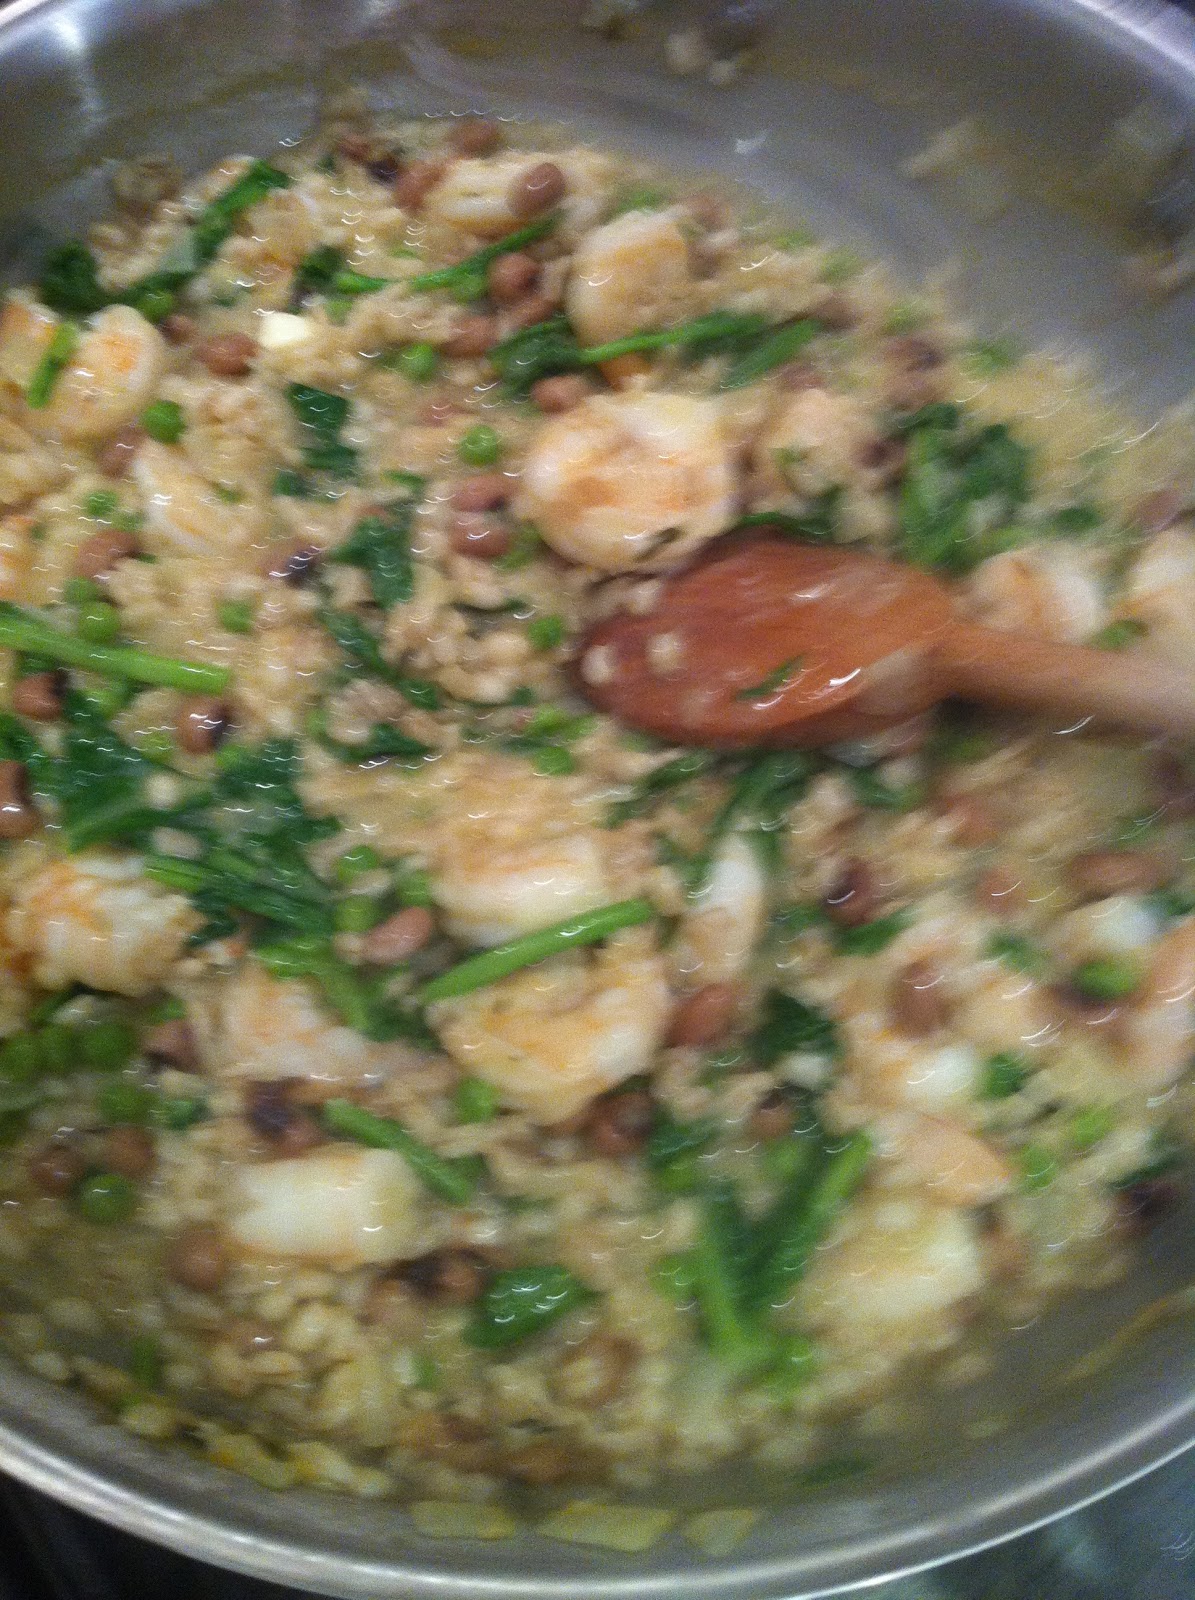
Remove the lobster tails, discard the water, and carefully pop the lobster tails out of the shells.  The easiest way to do this is to pull off the middle fin on the tail and then push the tail out of the top.  Be sure to save the shells! They are key to the lobster delicousness.  Once you have the lobster out of the shells, discard the clear part with the lobster legs and break the hard red shell into small pieces (nothing larger than a quarter.) Cut the lobster meat into bite sized pieces and put aside.  Put the shells on a baking sheet and bake in the 425 degree oven for 15 minutes.

Put one cup of chicken broth into a blender and add the baked lobster shells. Blend the shells with the chicken broth until it's liquefied.

Carefully strain the broth over a fine colander or sieve and retain the broth.
Next, get going on the risotto.  Start with one TB of the truffle olive oil in a heavy saucepan and in a separate pot, put the remaining chicken broth on simmer in the background. Back in the saucepan, heat the olive oil  on high heat and then add the carrots and shallots, sauteing for 2 min.  Add the rice and cook for 2 additional minutes. Turn the heat down to medium - low and add the brandy and stir until the liquid is absorbed, about 2 min more.  Once the rice has absorbed everything, add the lobster stock and about 1/2 of the warmed chicken broth.
Continue to stir and add chicken broth in 1/4 cup intervals whenever the rice has absorbed all the liquid.

Once you have incorporated all the chicken broth (it should take about 20 - 30 minutes) add the heavy cream and lobster meat and heat until warmed through, about 2 minutes.  Turn off the heat, stir in the chives and some salt and pepper and serve warm.  What a delicious treat! The champagne was the perfect compliment as the bubbles cut the richness of the risotto. Enjoy!


Sunday, February 19, 2012

Turkey Meatballs with Whole Wheat Fettuccine

A healthy spin on a winter favorite - spaghetti and meatballs.  The meatballs get a great, almost-crunchy crust on the outside, but the turkey still stays nice and soft on the inside.  Delicious.

I worked off a basic recipe to help with proportions, but doctored it with what I had in my pantry.
Here's what I used:
1 lb ground turkey meat
1/4 cup store-bought Italian breadcrumbs (even better if you make your own, and you can certainly use plain breadcrumbs)
1 egg, lightly beaten
2 TB chopped Italian parsley (if you use dried, I would only use 1 tsp)
1/2 yellow onion, minced
1/2 tsp dried oregano
You can also add some grated Romano cheese, if you have it - I did not
2 TB milk
salt and freshly ground pepper
whole wheat fettuccine
Sauce - I cheated and used some Prego I had in the fridge, but added a can of tomatoes so it still tasted like fresh sauce

First, get a large pot of water on the stove for the pasta, as that takes awhile to come to a boil.  You can always turn it down with a lid on if it boils too early, but there is nothing worse that waiting on your pasta when you have delicious meatballs ready to serve!
Then for the meatballs,
Preheat your oven to 350.  Wash your hands and add all the ingredients to a large bowl and dive in there to incorporate.  Try not to overwork the meatballs, but just make sure everything is incorporated.  How does it look? If it looks too dry, add a bit more milk or even a spoon of ricotta cheese if you have some on hand. Roll into golfball sized portions.  You then have three options - you can cook them directly in the sauce, which will probably take about 12-15 minutes, you can brown them in a pan and then transfer to an oven for about 5 min, or you can pop them directly in the oven.  I opted for the latter and popped them right in a 350 degree oven.
Cook for 8 - 10 minutes, until you see the tops beginning to brown.  Then flip them until the other side browns up (another 5-8 min.)
While the meatballs are cooking, cook your sauce (as I mentioned, I used about 1 cup of Prego plus one can of San Marzano tomatoes) and your pasta.


Serve the meatballs over pasta with a generous portion of sauce and top with grated Parmesan and enjoy!

Wednesday, January 11, 2012

Barley Risotto with Shrimp and Vegetables

Yum! Another good and mostly healthy one (are you noticing a January theme? I'll get back to pasta by Feb, I'm sure...) that can be adapted a thousand ways, depending on your mood and what's in your fridge. I had my first barley risotto at this awesome gastropub in Dublin, and I have had it in my mind since.  So when I was perusing Smitten Kitchen and saw this recipe, it was done that day.  Use the barley risotto as your base and get creative! I made it with chicken broth, black eyed peas, green peas, arugula, and shrimp, but I could see it with beef broth, mushrooms, rosemary, red beans, and a swirl of truffle olive oil. Or with vegetable broth and zucchini, tomatoes, peas, white beans, etc.  You get the idea.
Whatever combo you pick, just make sure you use a bean too, as it will be important to the consistency.  If you don't want to use a bean, I would add at least 1/2 cup less of the liquid (and maybe even a full cup less) as the beans absorb a lot.

Here's what I used:
4 cups low-sodium chicken stock plus 1/2 cup of water
2 TB olive oil
1 medium onion, diced
1/4 tsp thyme
1/2 cup white wine
1 cup pearled barley
1 cup beans - I used black eyed peas
3 cups chopped greens - I used arugula
1/2 cup freshly grated Parmigiano-Reggiano cheese, plus more for serving
2 TB unsalted butter, softened

Put your stock in a pot on medium heat on a back burner.  Make sure it warms, but don't let it come to a boil. You'll be gradually adding it as you go.
Next, add the olive oil to a large saucepan, heat, and add the onion and thyme. Cook until the onion is good and softened, about 5-6 minutes.  Then add the barley so it gets a little toasted - about -1-2 minutes.

Add the white wine and let it cook off for another few minutes until all the liquid is absorbed.  Then you are going to add the broth a 1/2 cup at a time, stirring until all the liquid is absorbed each time before you add more. Smitten Kitchen says to add the broth in 6 additions, but I'll be honest, I did the "hold the pot over the pan and pour out approximately 1/2 cup worth" method of adding the liquid and it worked just fine.  It did end up taking about 30 - 35 minutes, just like it says in Smitten Kitchen, so my "not dirtying another ladle / measuring cup" method can't have been all far off from correct. Once you have added the last 1/2 cup, you are ready to add your other ingredients.  If you are using a protein, add that first so that it has time to cook and / or get warm.  Shrimp was perfect here as they only take a few minutes to cook.  If you wanted to use chicken, it would probably work best to cook the chicken first and add the chopped pieces to warm, or just add the cooked chicken on top to serve.


You'll notice it is VERY yellow from the chicken broth.  Cooking it down will concentrate the flavors, so you want to be sure to add low-sodium broth.  With full sodium version, it would be far to salty. Then add your veggies (peas and black eyed peas for me) and cook for a minute or two.  Finally, turn the heat off and add your leafy green.  You will only need to fold your greens in for them to wilt enough for the dish.

Finally, the good stuff.  Add the cheese and butter and stir to incorporate. You don't really NEED to have the butter if you are being super healthy, but it does add a little creaminess and flavor to the whole dish.  Add some freshly cracked black pepper and salt if you need it (mine was plenty salty.) Top with a little extra parm and enjoy! It was a creamy, filling, and satisfying dish.  My leftovers were great the next night, too!

Sunday, January 8, 2012

Roasted Acorn Squash with Quinoa Pilaf


I have made this gem two times now, once with quinoa and once with bulgar wheat.  In my opinion, I preferred the quinoa - it was a bit lighter, but no less filling.  The bulgar wheat was a bit creamier, but didn't have the same flavor or lightness that the quinoa had.  Either way, it is a deliciously easy weeknight meal that is healthy yet filling.  I somehow came across this on a blog "We are not Martha" and I adapted it just slightly.
Here's what you are working toward:


Here's what I used:
1 acorn squash, carefully split in two halves, seeds scooped out and discarded
1 TB butter
1 cup quinoa
2 cups chicken or vegetable stock
1 TB olive oil
1 small yellow onion, diced
2 garlic cloves, minced
1 tsp red pepper flakes (I subbed these for 2 habanero peppers, chopped finely.  If you enjoy a spicy dish, use the habaneros instead of red pepper flakes)
1/2 cup chopped mixed mushrooms - I used shitakes, oyster, cremini
2 cups of fresh spinach, uncooked and chopped into bite size ribbons
1/2 cup feta, crumbled
1 TB parsley, chopped
1 TB fresh lemon juice

Preheat the oven to 375 while you are prepping your ingredients.  Put the 2 squash halves on a rimmed cookie sheet, sprinkle with salt and pepper and put 1/2 of the butter in each squash.  Pop them in the oven when it's preheated and set the timer for 45 minutes.

Meanwhile, you can prep the stuffing.  Put the quinoa / bulgar wheat / farro / whichever grain you would like to use in a pot and cook per the directions, using broth instead of water for a bit more flavor.

While that cooks, add the olive oil to a pan and sautee your mushrooms, onion, garlic, and pepper (habanero or red pepper) until they are nice and cooked - about 10 minutes. Season with salt and pepper to taste and add the lemon juice to the mixture. Turn the heat to low and add the cooked quinoa when it's done. Stir to incorporate and add the parsley, feta, and spinach.  Reserve a bit of the feta and parsley to top the squash if you like.
Once the squash is cooked, fill the squash with your quinoa mixture, top with feta and parsley, and enjoy!


Wednesday, December 21, 2011

Mushroom Bourguignon

Happy New Year! Here's a veggie one for those of you looking to start the year off right...
My dear friend Mary came for dinner, so I combed the internet for the best possible vegetarian recipe I could find.  I settled on Mushroom Bourguignon from Smitten Kitchen, and it was a earthy, hardy take on vegetarian that worked for Mary and my larger-than-average husband (he's 6'6".) 
While this was quite tasty the first time around, the leftovers were not great- the mushrooms became a little slimy - so I would scale this up or down to exactly what you need to cook.

Here's what I used for 5 large portions:
2 TB Olive Oil
2 TB butter, softened
2 lbs portobello mushrooms, cut into 1/4 in slices, stems discarded
1/2 carrot, finely diced
1 small yellow onion, finely diced
2 cloves garlic, minced
1 cup full-bodied red wine
2 cups beef or vegetable broth
2 TB tomato paste
1 tsp fresh thyme or 1/2 tsp dried
1 1/2 TB flour
1 cup pearl onions (thawed if frozen)
Egg noodles for base

Tomato Paste Tip: I was tired of buying tomato paste, using one TB and throwing the rest out after it went bad.  So I spooned the tomato paste out by the TB onto a sheet of parchment paper and laid them down in the freezer. After they were frozen, I wrapped them in plastic and popped them in a ziplock.  Now, when I need a TB of tomato paste, I can just grab one of my frozen TBs from the freezer and not feel so wasteful.
A close-up of these beautiful mushrooms and carrots post my trip to Brooklyn Kitchen for an excellent knife skills class!

 Ok, enough about the ingredients.  To get going, heat a large dutch oven (I used the 4.5 qt one that Mary's mother gave me) with one TB olive oil and one TB butter. Once those are melted together, add the mushrooms to give them a sear.  You'll want to let them turn dark brown, but take them back out of the pan before they start releasing any juices.  While I did this all in one go, it would probably be a bit easier to do in batches.
Once all the mushrooms are back out of the pan, add the second TB of olive oil and add the carrots, onion, thyme, and some salt and freshly ground black pepper.  Turn the heat down to medium and let them cook for about 10 minutes.  Add the garlic and let that cook for an additional minute.

Stand back and add the wine, making sure to scrape up any deliciousness on the bottom of the pan.  Turn the heat up and reduce until it's about 1/2 the liquid - it should take about 15 minutes. Stir in the tomato paste and broth and add back the mushrooms (plus any juices that have collected in your bowl) to the pot. Let those simmer for 25 minutes.  For the last 10 minutes, add the pearl onions so they get nice and soft.
Finally, combine the flour and butter with a fork until it looks like a paste.  Add to the pot to thicken and let it cook for a final 10 minutes. Season to taste - mine needed quite a bit of salt.
Serve over egg noodles or rice and feel free to garnish with sour cream, parsley or thyme.
Enjoy!


Tuesday, December 20, 2011

Fettuccine with Creamy Sausage Tomato Sauce

Again, another long break! Work has been too busy to cook and blog.  So I have been cooking, just not blogging! I am trying to use the holidays as a chance to get caught up and clear some of these pictures out of my phone!
This was a delicious treat that I made that does NOT fall into the category of health food.  But we were both craving a delicious pasta without heading out of the apartment, so I used this recipe from Epicurious without really changing much.  It was creamy, hardy, and an excellent treat for a cold day.  It's a rare day that I cook with cream, but this was worth every calorie. 


Here's what I used:

  • 2 tablespoons olive oil
  • 3 shallots, chopped
  • 2 large garlic cloves, chopped
  • 1 pound sweet Italian sausages, casings removed
  • 1 cup whipping cream
  • 2 14.5-ounce cans diced tomatoes in juice with Italian seasonings
  • 1 tablespoon dried sage
  • 1/2 teaspoon dried crushed red pepper
  • 1 package of fresh fettuccine
  • 1/2 cup grated Parmesan cheese

I started by chopping my shallots and garlic and adding them to a hot pan with a swirl of olive oil.  I let those sweat until they were softened, about 3 minutes.

Then I added the sausage, working to break it up into small pieces with the back of a wooden spoon.  The smaller the better here, so that it can hold all the delicious sauce. It took about 10 minutes until the sausage was no longer pink in the middle.  Then it's time to add the rest of the sauce. If it looks extremely greasy here, you can use a big metal spoon to get any sausage grease out of the pan - I got about one small spoonful out before I added the rest of the sauce ingredients. 


To this, add the cream and incorporate before adding the tomatoes (make sure you crush them with your hands as you add them), the tomato juices, sage, and red pepper. Stir and incorporate, bring just to a boil, and turn the heat down to simmer for 15 minutes. 
Meanwhile, get your pasta water boiling so that you can add it at the appropriate time (8-9 min out for dry, 3 min out for fresh pasta.)  While I remembered to reserve some pasta water, I did not need to use it. Once the pasta is cooked, strain and add directly to the sauce to coat.  I like to use my silicone kitchen tongs to make sure all the pasta is evenly coated. You can add a little salt and pepper if you need to, though I did not have to add any additional salt. Instead, I topped with a little salty parmesan cheese to serve. 
Buon Appetito!

Saturday, November 19, 2011

Pumpkin Waffles

Wow, I have been bad! I can't believe I haven't posted in three weeks.  I have been traveling for work, so not doing as much cooking.  But I blame a glass of wine here and there for why I haven't been posting :)

So a few weeks ago, I made some pumpkin muffins (with whole wheat flour and honey...healthy, but just...ok.)  Anyway, I had loads of leftover pumpkin.  The hubby had been working non-stop all week and had to go back in the office all day Saturday, so I decided to make him a treat before he had to go work.  I gave him the choice of pumpkin waffles or pumpkin pancakes, reeeeeaaaaally hoping he would pick the pancakes since they are easier, but he wanted waffles.  So waffles it was.

I scoured the internet looking for the perfect recipe, as I'm a waffle novice, and pumpkin in general is very dense and can be tricky to work with since it will weigh down just about any fluffy waffle recipe I could think of. And then I came upon a blog where a woman has tried over 90 recipes on the quest to make the perfect pumpkin waffle.  Perfect! I admire her dedication, as I would not be able to stick to it like she did!
http://pumpkinwaffles.wordpress.com/ultimate-pumpkin-waffle-recipe/
It was pretty perfect.  Here's what you're working towards:

I used her recipe nearly exactly.  The only thing I would change would be to add a touch more sugar the next time - AND to crank the waffle iron up to high instead of medium.  I prefer a crispier waffle, so next time I would turn that iron up!
Here's what I used:
• 1/4 cup light brown sugar (would go just under a 1/2 cup next time)
• 3 Tbsp. cornstarch
• 1 1/4 cup all-purpose flour
• 1 1/2 tsp. baking powder
• 1/2 tsp. salt
• 1 3/4 tsp. cinnamon
• 2 tsp. ginger
• 1/4 tsp. cloves
• 1/2 tsp. freshly grated nutmeg or 1/4 tsp dried (I used dried)
• 2 large eggs
• 1 cup whole milk
• 1 cup canned solid-pack pumpkin
• 4 Tbsp. unsalted butter, melted and warm 


First, in a medium sized bowl, mix your dry ingredients - the brown sugar, cornstarch, flour, baking powder, salt, and spices. If you give the cornstarch and brown sugar a stir first, that will help break up the cornstach, which can stick together and get clumpy.  No one wants a cornstarch clump in their waffle! This might be a good time to preheat your waffle iron, as well.
Then separate your eggs - putting the yolks in a big bowl, and the whites straight in your mixer bowl. You can get those going until stiff peaks form (2-3 min) while you mix the pumpkin and milk into the into the yolks.

Pour the melted butter into your pumpkin mixture, stirring or whisking as you add it.

Then stir the dry ingredients into the pumpkin mixture.


Next it's time to fold in your egg whites, very carefully, so that they are just incorporated but not stirred. 

Now for the fun part! Into the waffle iron it goes. I did a light spray with cooking spray before I added the waffle batter.

I think I filled up the first one too much, because it only made 2 full waffles, but my iron has very deep pockets.

 Next time, I would probably double the recipe so I could freeze a batch!
Delicious!They were perfectly spiced, though I would prefer a touch more sugar.  I served with dried cranberries and fresh maple syrup. Enjoy!